Many users prefer using Xender on a larger desktop screen, leading them to search the internet for a free way to install Xender for PC or Mac. After searching for a solution myself, I finally discovered the easiest method—one that I still use today without any issues.
Now, I am going to share with you the complete process of connecting Xender on Windows, whether you are using Windows 10, Windows 11, or macOS. Let me clarify first that Xender does not have an official PC or Mac desktop app. We will follow these three steps to run or set up Xender on PC:
- Install an Android emulator
- Install Xender APP from the Google Play Store/App Store
- Use Xender inside the emulator to transfer files
Step 1: Install an Android Emulator
There are many free emulators available on Google. But we will use the BlueStacks emulator in our case.
How to Install BlueStacks Emulator
- Go to google.com and search for “Bluestacks emulator”.
- Click the first link, “https://www.bluestacks.com/”. It will open in a new tab.
- There is a button “Download BlueStacks”. Click on it, and wait until the download is complete.
- After the download is completed. Click on it to proceed with installation.
- Once installed, open it.
Step 2: Install Xender APP from the Google Play Store/App Store
- On the Bluestacks screen, click on the settings icon.
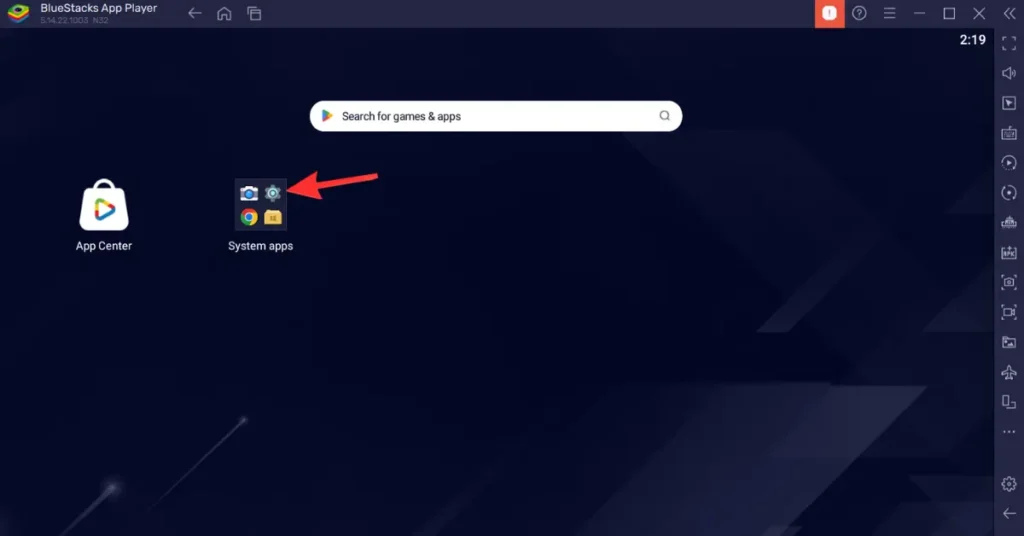
- Click Sign In for the Google Play Store. If you are already signed in, then ignore this step.
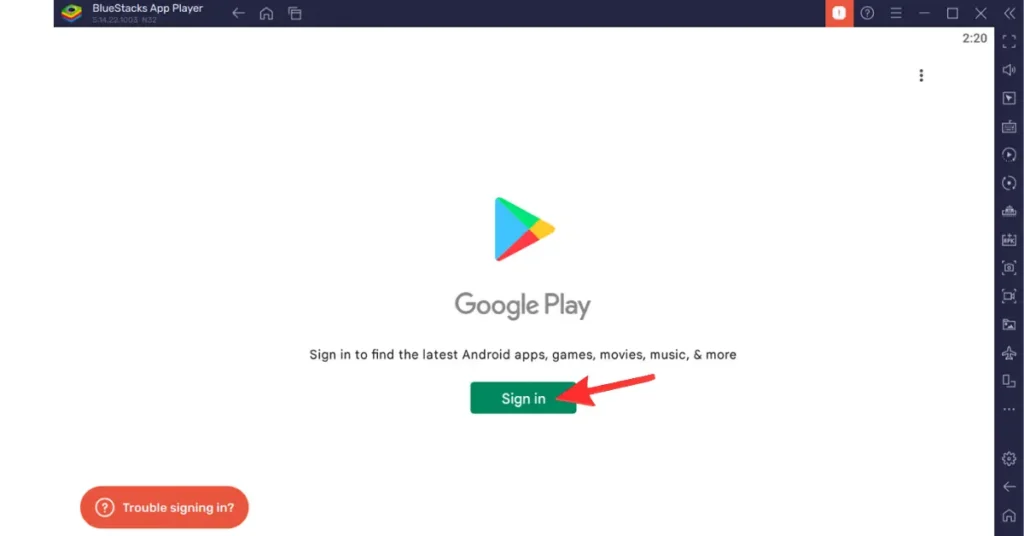
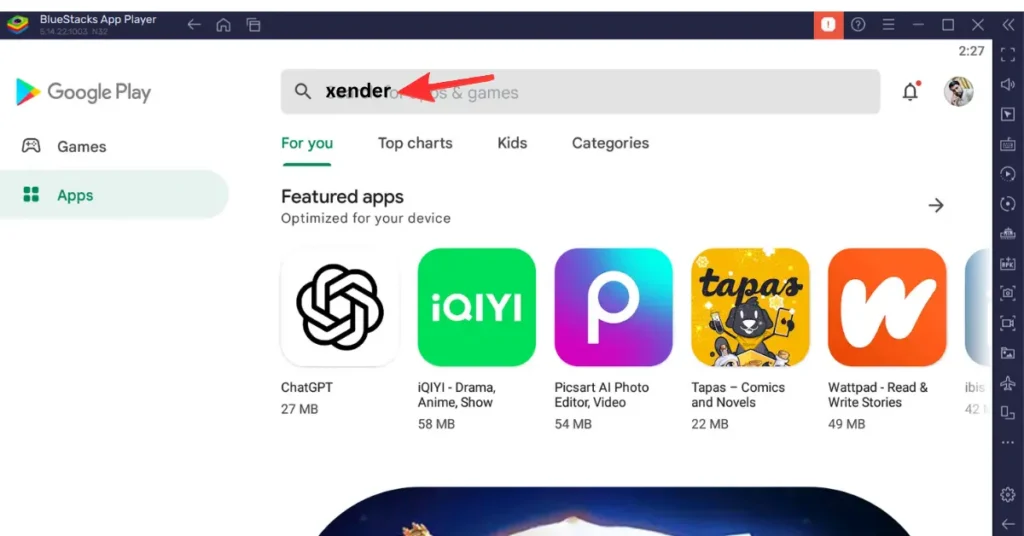
- At the Google Play Store, type “Xender” and click Search.
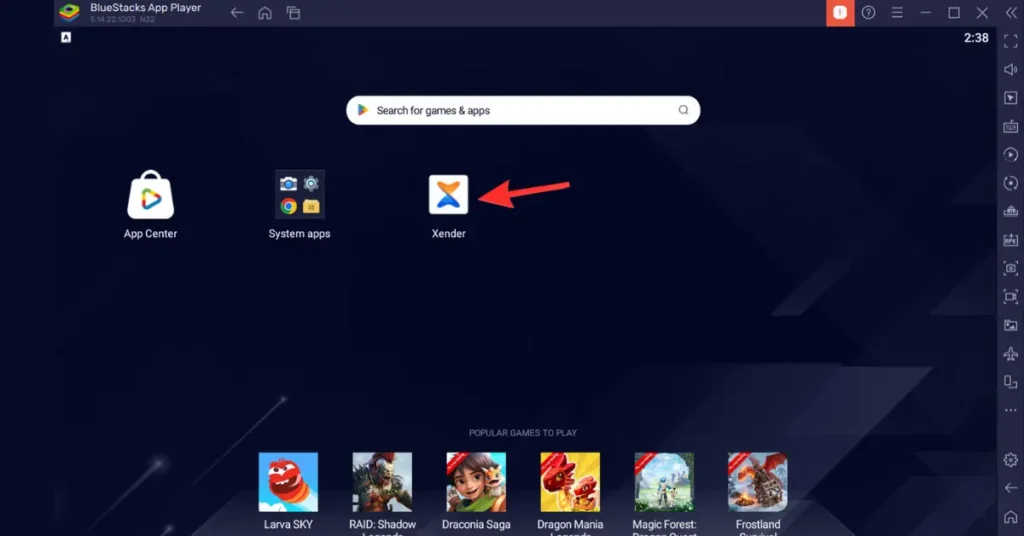
Step 3: Use Xender inside the emulator to transfer files
- Now, click Install for app installation. It will be installed inside the emulator.
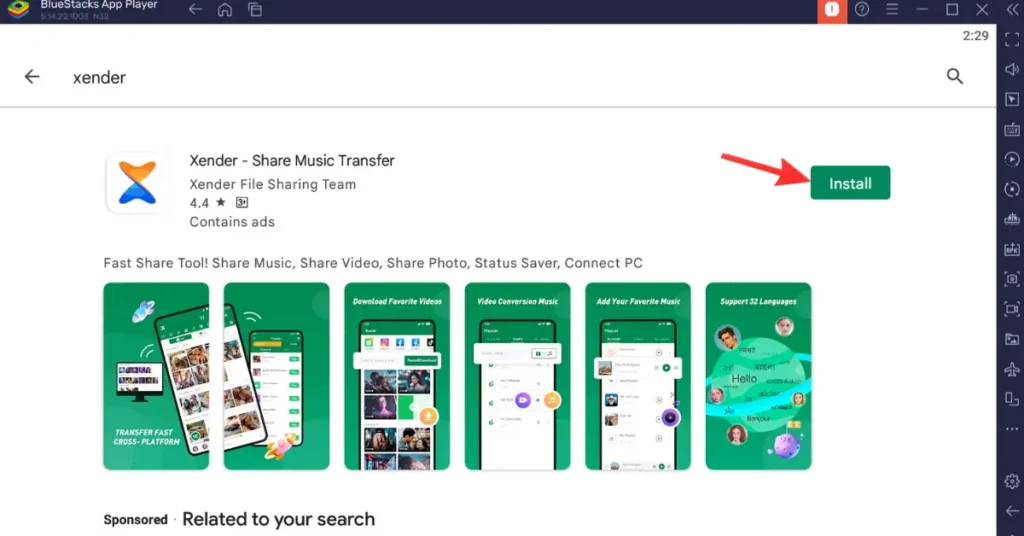
- Now, Xender is available on the emulator screen. Click and open it. Enjoy using Xender on a desktop.